
If you’re figuring out how to make an AI music video from a finished song, there are three practical routes: generate the whole video automatically, build it shot by shot, or start with a full cut and revise individual scenes.
The last option is the workflow we use most often. You get something complete on screen quickly, then spend your time fixing the parts that actually need work.
This guide covers all three approaches and then walks through the hybrid process in VibeVid, from upload to first cut to shot-level revisions.
What You Need to Make an AI Music Video
You don’t need a full storyboard before you start, but a few things make the process much smoother:
- A finished song. Use the version you actually plan to release. If the audio changes later, your scene timing, pacing, lip-sync, and transitions may need to change too.
- A visual direction. You should be able to describe the video in a sentence or two: what it feels like, where it takes place, who we’re watching, and what kind of camera language you want.
- Lyrics (optional). Helpful if you want visuals to follow specific lines, plan lip-sync moments, or time scene changes around verses and choruses.
- Reference images (optional). Useful when the same performer or character needs to stay recognizable across multiple shots.
You can start with less. Just expect to spend more time figuring things out during generation.
Before You Start: Prepare Your Audio and Concept
With the audio locked, listen through once before you start building visuals.
Listen through once and mark the obvious changes in energy: intro, verse, pre-chorus, chorus, bridge, instrumental break, final hook. You don’t need a frame-by-frame storyboard yet. You just want to know where the video may need to change with the music.
Then write down the visual idea in plain language. Cover the main subject, setting, mood, and camera style.
For example:
That gives the model something concrete to work with. “Make a cool cinematic music video” leaves too much open.
If the music video (MV) has a recurring lead character, lock the basics early: age range, hair, outfit, attitude, and the kind of environment they belong in. A simple character reference here can save a lot of cleanup later.
Choose How You Want to Make the Video
There are three common ways to build an AI music video. The biggest differences are how quickly you get a full cut, how much control you have over individual shots, and how much manual work you want to do.
All-in-One AI Music Video Generators (Fastest)
Upload the song, choose a direction, and let the tool handle most of the storyboard, scene generation, timing, and assembly.
This is the quickest route to a full video. It’s a good fit when the priority is getting a release, YouTube upload, or promo video out without managing dozens of clips yourself.
The catch is shot-level control. Some tools make it easy to generate the whole video but harder to fix one weak scene afterward. Full-length generation can also use a larger chunk of credits upfront.
Best for: solo artists, Suno creators, Udio creators, and independent musicians who care most about speed.
Clip-by-Clip Generation (More Control)
With tools such as Kling AI or Runway, you build the video one shot at a time. You decide the framing, action, camera move, location, and transition for each clip, then assemble everything in an editor.
This works best when you already know what you want on screen. A verse can stay on a slow walk toward camera while the chorus opens into a wider performance shot, and you can design those moments directly.
You also take on the hard parts yourself: character consistency, continuity, timing, retries, and final editing. Credits are easier to control shot by shot, although difficult scenes can get expensive after several failed generations.
Best for: creators with a specific visual plan who want tight control over individual shots.
Hybrid Workflow (Speed + Control)
Start with a complete first cut. Watch it against the song. Keep the scenes that work, then redo only the ones that don’t.
That gives you a fast way to test the overall idea without locking yourself into the first generation.
Best for: creators who want a full video quickly but still expect to revise specific shots.
For the rest of this guide, we’ll use this hybrid approach in VibeVid.
How to Create an AI Music Video with VibeVid: Step by Step
VibeVid uses a song-first workflow: start with your track, generate a complete MV, then keep what works and refine the shots that need more attention.
Step 1: Open VibeVid and Start a Music Video
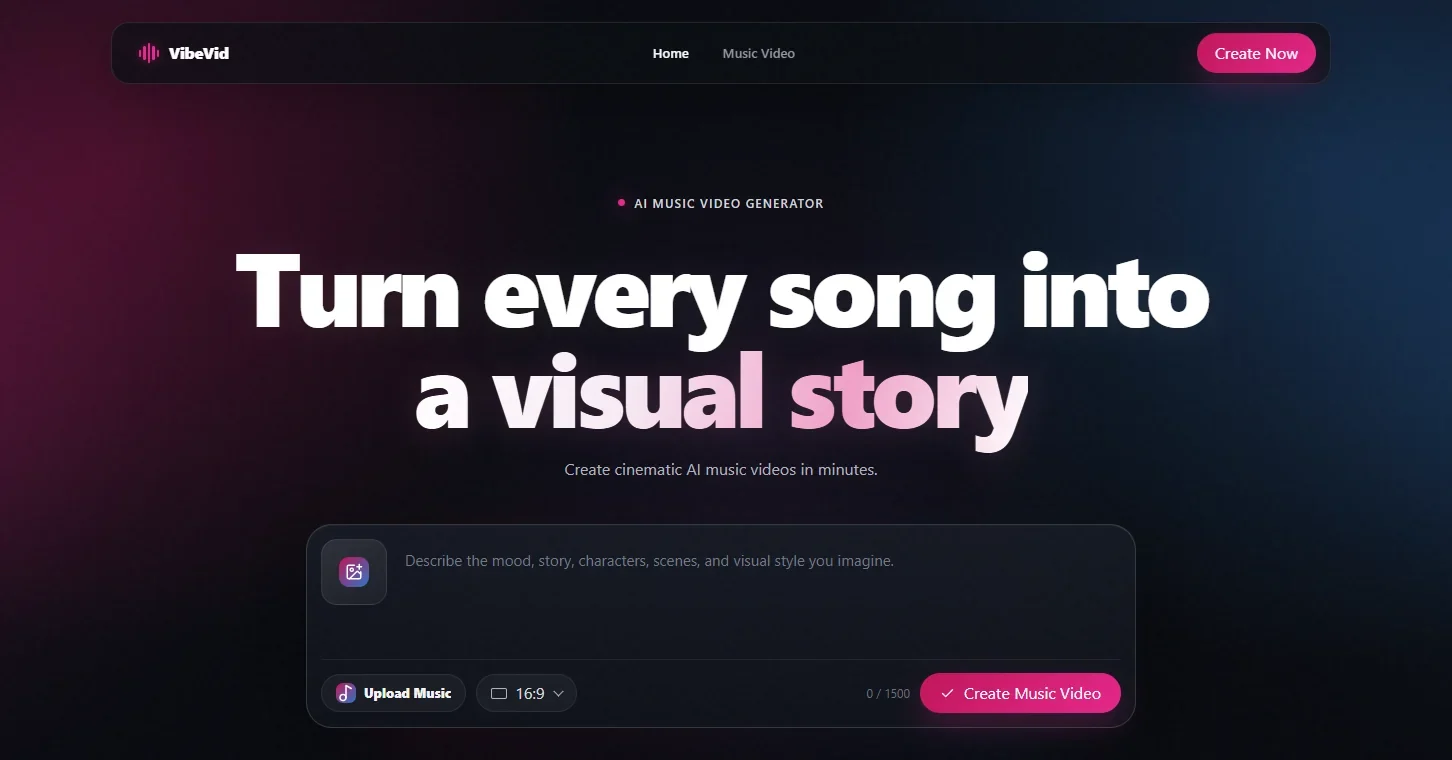
Open VibeVid in your browser and start the Create Music Video workflow. It’s web-based, so there’s no separate editing app to install before you begin.
You don’t need a finished storyboard at this point. A final song and a clear sense of the visual direction are enough to get started.
Open the AI Music Video Generator
Step 2: Upload Your Song
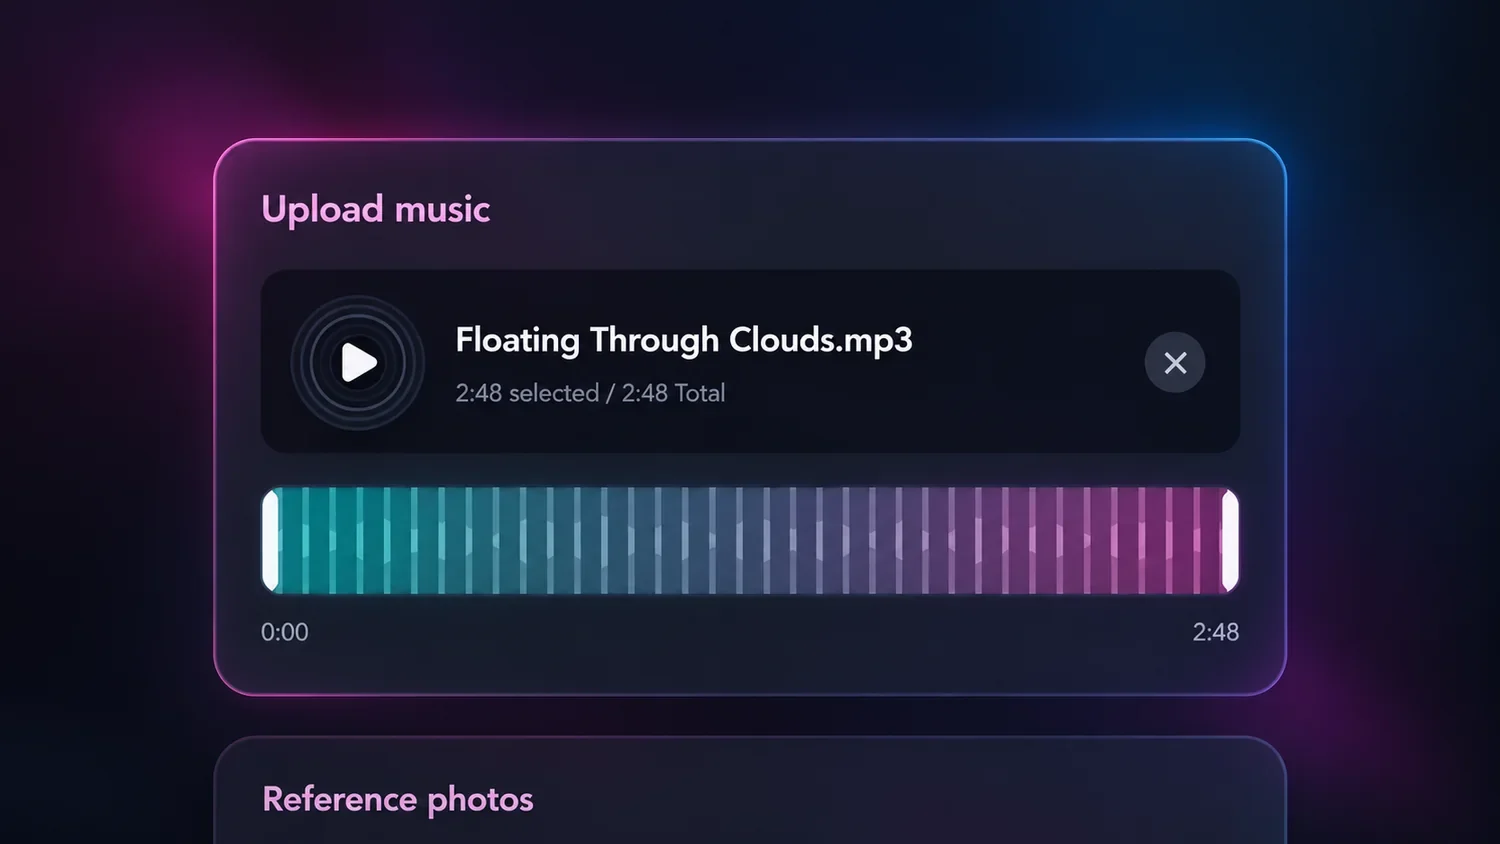
Upload the track you want to turn into a music video.
Once the song is in the project, use it as the timing reference for the whole MV. Scene changes, performance moments, and visual intensity should follow what the track is doing.
Before moving on, listen for a few anchor points: when the vocal starts, where the chorus hits, whether there’s a beat drop, and where the energy rises or falls. Those moments will matter when you review the first cut.
Step 3: Describe the Style and Define Your Lead Character
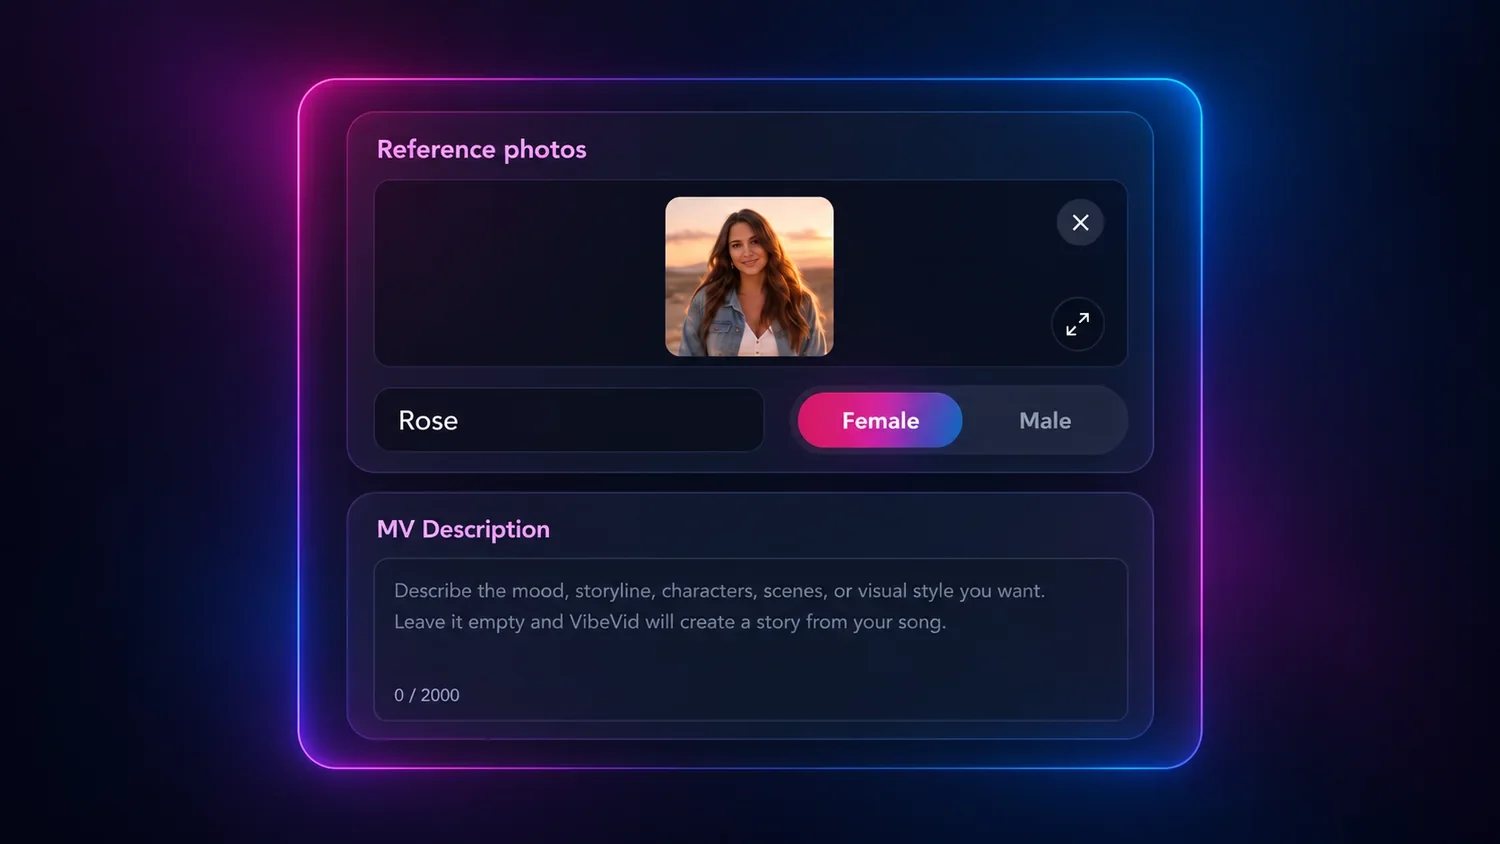
Next, describe the visual world of the video. Focus on the overall direction instead of trying to script every second in one giant prompt.
A strong brief might include:
- Subject: solo singer, dancer, band member, fictional character, or story protagonist
- Setting: rooftop at sunset, empty nighttime street, bedroom, stage, desert road, subway platform
- Mood: intimate, euphoric, nostalgic, aggressive, dreamy, playful
- Visual style: cinematic realism, anime, glossy pop, handheld indie, surreal, performance-driven
- Camera language: slow tracking shots, close-ups, low angles, handheld movement, wider dance coverage
If the same person needs to appear throughout the video, keep the lead role consistent. Face, hair, outfit, accessories, and overall attitude should stay stable from shot to shot. When the exact look matters, a reference image gives the model a much stronger anchor than repeating the character description every time.
Keep the visual brief focused. “Minimal nighttime indie performance with warm streetlights” is easier to keep coherent than a prompt trying to be cyberpunk, vintage film, hyperreal, anime, luxury commercial, and documentary all at once.
Step 4: Generate and Review the Storyboard
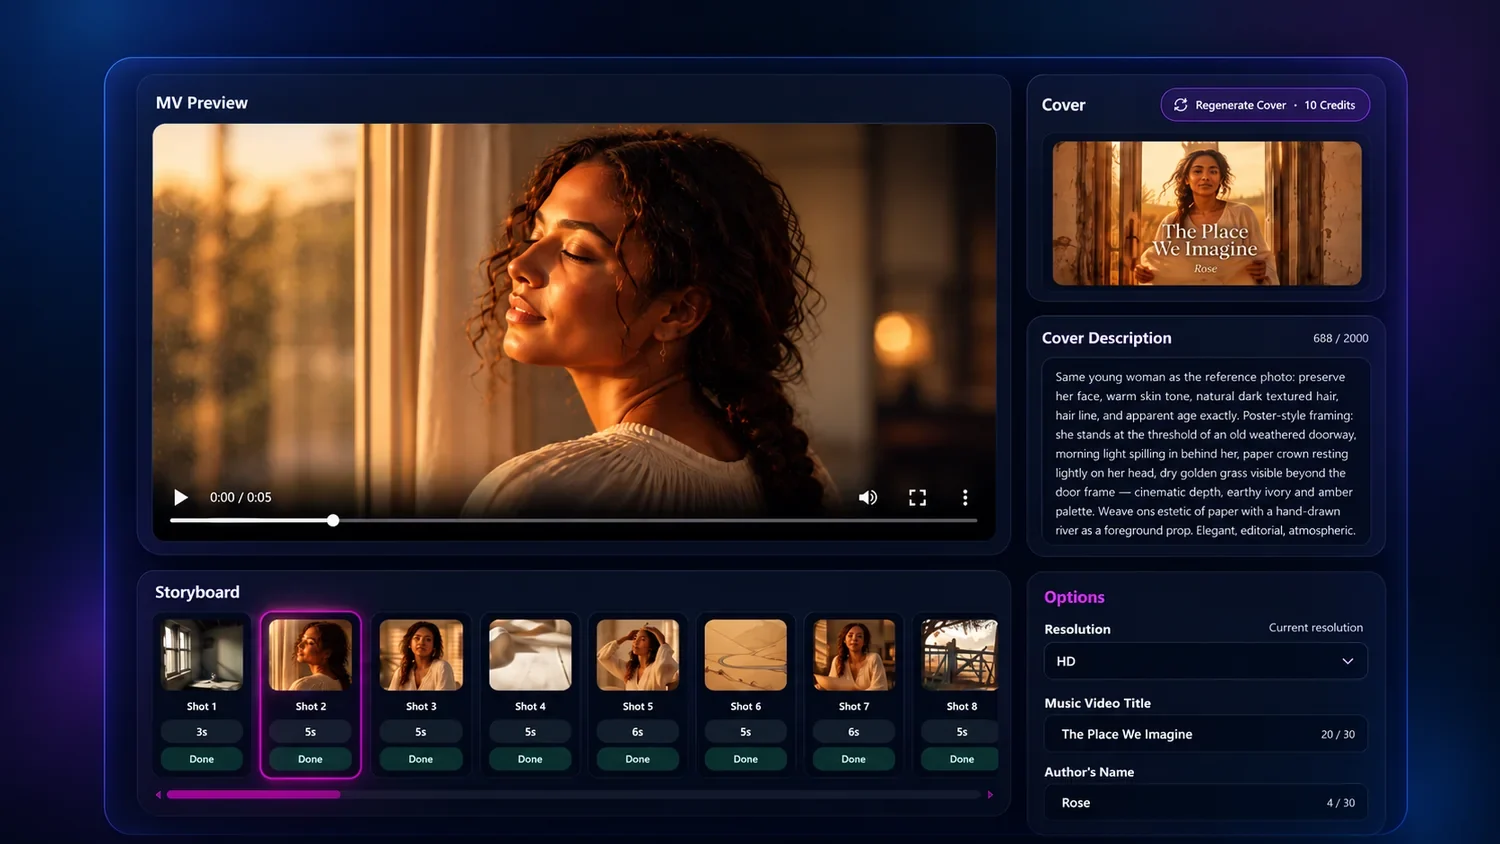
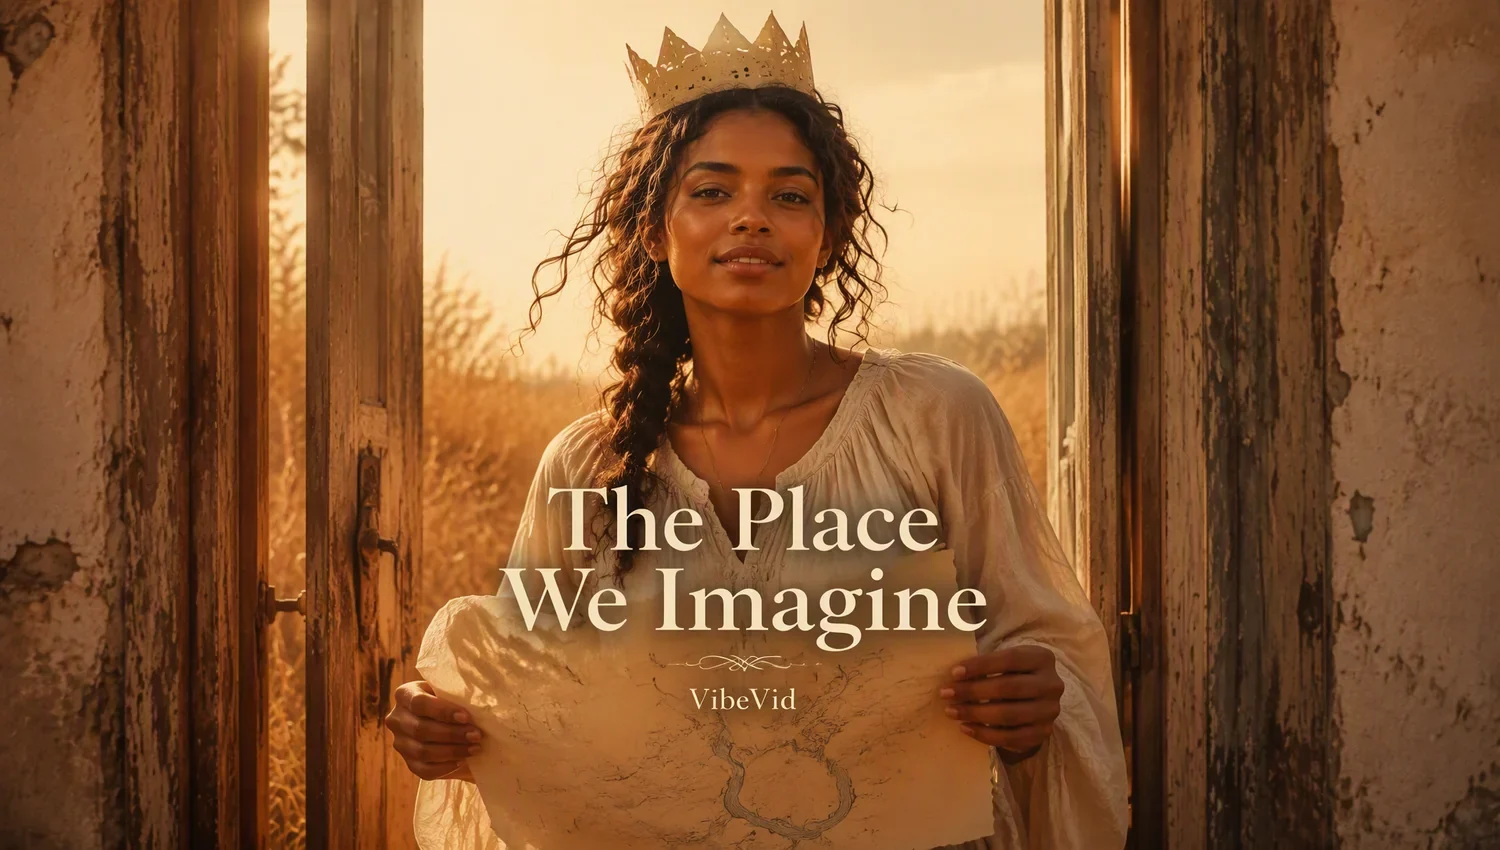
Before VibeVid generates the full music video, it creates a cover image, an MV Story Design, and a storyboard. This is your chance to check the direction before spending most of the credits on full video generation.
Look at the overall story, the lead character, the sequence of locations, and whether the visual energy makes sense across the song. If the direction feels off, change it here rather than waiting until the full MV is finished.
In our “The Place We Imagine” test, this stage took about 3 minutes, cost 15 credits, and produced a 36-shot storyboard for a 3:15 song.
Step 5: Generate the Full Music Video
Once the storyboard looks right, generate the full MV.
For “The Place We Imagine,” full generation took about 8 minutes and cost 2,829 credits at 16:9, SD quality, with a watermark and no lyrics.
Watch the first cut straight through before editing anything. Check whether the video holds together as one piece, whether the energy follows the song, and whether the lead stays recognizable across scenes.
A shot can look good by itself and still land badly in the sequence. Judge it in context before deciding what to change.
Step 6: Fix the Weak Shots
Now go through the video shot by shot.
Check:
- Does the lead still look like the same person?
- Does any movement look strange, especially hands, legs, walking, or turning?
- Does a shot stay static too long?
- Does the energy fit this part of the song?
- Does the cut happen before the action is finished?
- Does a lip-sync moment look off?
If most of the video works, keep it. Open the shot that doesn’t, adjust the prompt or reference image, and regenerate only that part.
Recent VibeVid test: The Place We Imagine
- Song length: 3:15
- Storyboard: 36 shots, about 3 minutes, 15 credits
- Full MV: about 8 minutes, 2,829 credits
- Shots revised: 1 of 36
- Revision: about 1.5 minutes, 59 credits
- Recomposition: 10 credits
- Total: about 15 minutes, 2,913 credits
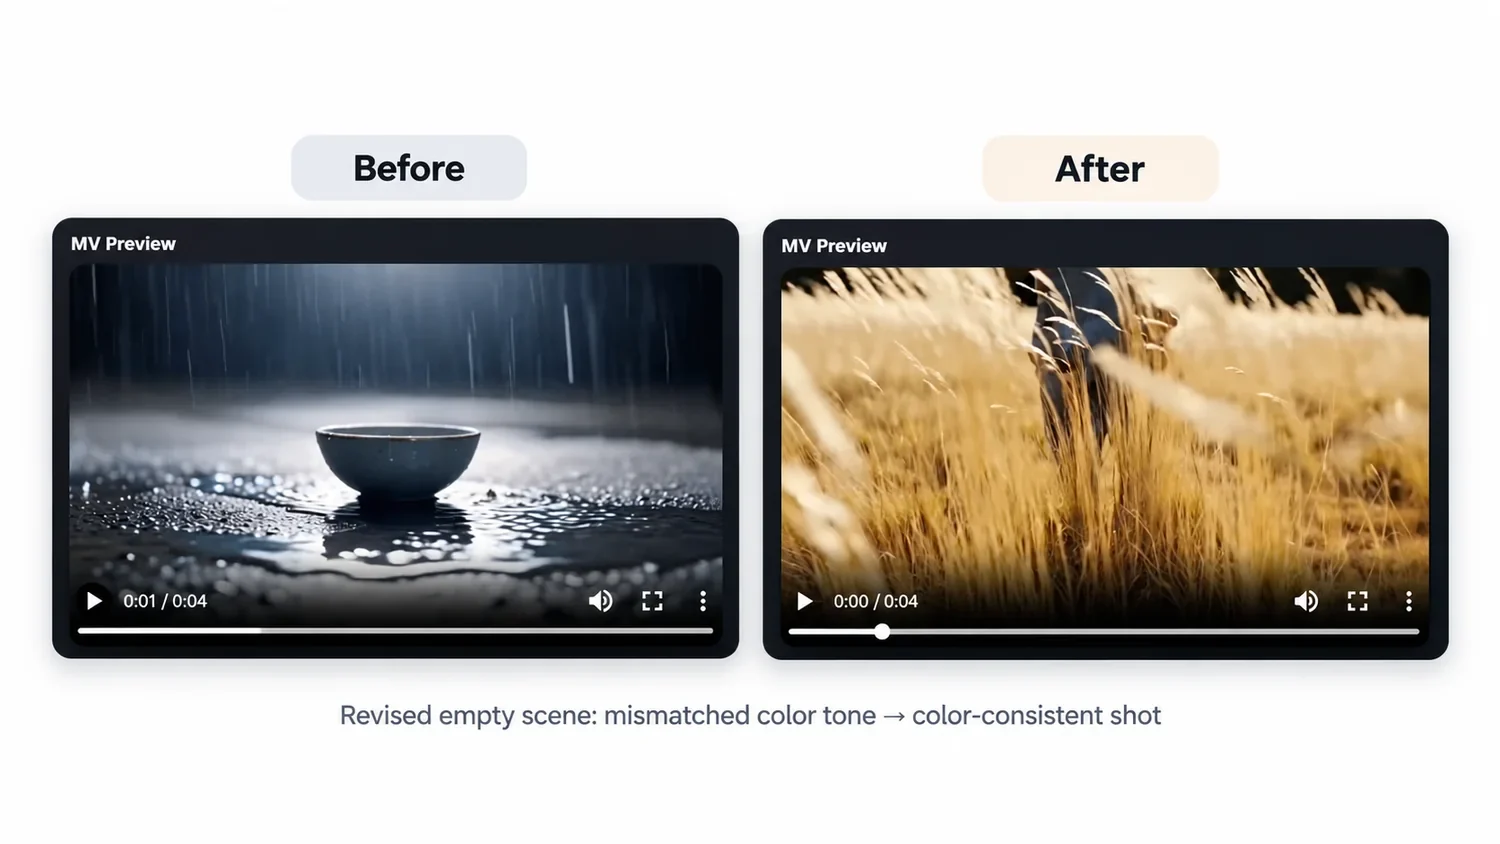
The one shot we changed was an empty scene with a color tone that didn’t match the rest of the video. We rewrote that shot prompt and regenerated it once. The other 35 shots stayed as they were.
Step 7: Export for YouTube, TikTok, Reels, or Shorts
Before you export, decide where the video is actually going to live.
For a traditional YouTube music video or widescreen player, 16:9 is the standard choice. For TikTok, Instagram Reels, and YouTube Shorts, 9:16 gives you a native vertical frame.
If short-form distribution matters, think about vertical composition before the very end. A simple center crop can push the performer out of frame or make them feel too small on a phone screen. Vertical shots work better when the main action stays closer to the center and the subject has enough screen presence.
You also don’t have to force the entire MV into a social format. Often, the better move is to take the strongest 15-to-30-second section—usually the hook or chorus—and build a dedicated vertical cut around it.
AI Music Video Prompt Examples
Use these as starting points, not templates you have to copy word for word. Keep the structure, then swap in the character, setting, color, and camera behavior that fit your track.
Real Prompt We Used: The Place We Imagine
Here’s a shortened version of the direction we actually used for “The Place We Imagine”:
This prompt gave the video one lead character, a clear emotional arc, recurring visual motifs, and different actions for different parts of the song.
Story-Driven Folk
Performance / Hip-Hop
Common AI Music Video Mistakes
1. Generating Random Clips Without a Visual Plan
A bunch of good-looking AI clips can still make a bad music video. If every scene has a different character, location, color palette, and visual style, the result starts to feel like a demo reel instead of one release.
Set a few rules and stick to them: one lead character, a limited number of locations, a consistent color direction, and a clear camera style. Let the shots change without changing the entire visual world.
2. Changing the Character in Every Shot
Small changes in a face, hairstyle, outfit, or body type become painfully obvious once the shots are cut together—especially in a performance video where viewers are supposed to follow one artist.
Define the character before you generate the full sequence. Reuse the same description and reference image when possible, and avoid inventing new appearance details from shot to shot.
3. Ignoring the Structure of the Song
The video should react to the music. That doesn’t mean cutting on every beat, but the visual energy should rise and fall with the track.
A quiet verse can hold longer shots and tighter framing. A chorus can open up with wider shots, more movement, stronger performance, or faster transitions. Save your biggest visual moments for the parts of the song that can actually support them.
4. Cutting Away Before an Action Finishes
AI-generated motion can look surprisingly natural right up until the edit breaks it. If a character turns, stands up, reaches for something, or walks toward camera, give the action enough time to finish before the next scene begins.
If a transition feels wrong, check the timing before blaming the generation. Sometimes the shot just needs another half-second to breathe.
5. Trying to Fix the Whole Video With One Giant Prompt
If eight scenes work and one doesn’t, don’t rewrite the entire creative direction just to fix scene nine. That usually creates new problems in shots that were already fine.
Fix the smallest possible unit. Adjust the weak shot, regenerate it, and keep the rest of the video stable.
Frequently Asked Questions
Can I make a music video with AI?
Yes. AI video tools can generate characters, environments, performance shots, camera movement, and complete visual sequences from a finished song. You can build the MV clip by clip or use an all-in-one or hybrid workflow to get a full first cut and refine it afterward.
How long does it take to make an AI music video?
In one recent VibeVid test, we used a 3:15 song called “The Place We Imagine.” The initial story design and 36-shot storyboard were ready in about 3 minutes. After we approved the storyboard, the full MV took another 8 minutes to generate. We changed one shot, then had a version we were happy to publish about 15 minutes after starting.
That’s one test, not a guaranteed render time. Longer songs, different settings, and extra shot revisions can change the total.
Do I need video editing skills to make an AI music video?
Not necessarily. All-in-one and hybrid tools can handle much of the generation and assembly for you. It still helps to understand basic pacing, framing, and shot selection when you review the result. A clip-by-clip workflow usually requires more traditional editing because you have to assemble and time the clips yourself.
Can I make an AI music video for free?
Sometimes, at least for testing. Many AI video tools offer limited free credits or trial access, but a full-length music video usually takes more generation time and more credits than a single short clip. The final cost depends on the video length, model, resolution, and how many scenes you regenerate. You can check VibeVid pricing and plans before starting a full-length project.
Can I make a vertical AI music video for TikTok or Reels?
Yes. For TikTok, Instagram Reels, and YouTube Shorts, work in 9:16 and make sure the important action still reads clearly on a phone screen. If you’re repurposing a widescreen MV, check every shot instead of assuming a center crop will work. For stronger short-form results, it’s often better to build a dedicated vertical cut around the strongest 15-to-30-second section of the song.
Can I turn a Suno song into a music video?
Yes. Once your Suno track is finished and available as audio, you can use it as the starting point for an AI music video. The workflow is the same: choose a visual direction, generate a first version, then refine the scenes that need more control.
Are AI music videos legal?
AI-generated music videos aren’t automatically illegal, but the usual rights questions still apply. Make sure you have the right to use the song, images, logos, likenesses, and other source material in the video. Commercial-use rules can also vary by platform and subscription plan, so check the terms of the tools you use before publishing or monetizing the final result.
Quick Recap
- Lock the song before you start. Changing the track later can throw off scene timing, lip-sync, and transitions.
- Keep one clear visual direction. A smaller set of recurring characters, locations, and colors usually holds together better.
- Generate the full video first, then watch it against the song.
- Fix single shots when they fail. Leave the scenes that already work alone.
That’s the workflow VibeVid is built around: get the whole music video on screen first, then spend your time on the parts that still need attention. You can start with the AI Music Video Generator.
Create your AI music video
Upload your finished song, generate the first cut, and refine individual shots when needed.
Create Music Video